Install the iSphere Library
You need to install the iSphere Library on which many of the iSphere
plug-ins rely. The recommended way, and the one that requires the
least effort, is the Integrated Upload Feature. You can also
install the library manually.
| Note: The library is saved for V7R1, so you cannot use the
Integrated Upload Feature if you are on an earlier release.
The library can be compiled for V6R1, but you need to do
that by yourself, using an i Project. (V7R1 is the earliest
release the iSphere developers can save the library for.) |
| Important: We are sorry to let you know that we no
longer have an option to create the iSphere library for V6R1. Version
3.5.4.r was the last release with a V6R1 library. All newer versions will
be compiled for V7R1. Please refer to
Using an i Project to read how to install
the library from an i Project. |
Select the option that works best for you:
Using the Integrated Upload Feature
- Start RDi 9.5.1.3+.
- Click on "Windows / Preferences".
- Expand item "iSphere".
- Click "Library".
- In "Host name:" enter the name of an IBM i host
system that is configured as a Remote System in the Remote System Explorer view.
Review the "FTP port number" and the name of the "iSphere
library". The default FTP port is 21. The default library name is
ISPHERE.
Note: You may use another library name, but be aware
that this library will be deleted if it exists.
- Verify the ASP group. The name of the ASP group is used for parameter RSTASPDEV
of command RSTLIB when restoring the iSphere library. The possible values are:
| *NONE | - | The DLTLIB and RSTLIB commands are executed without the ASPDEV and RSTASPDEV parameters. |
| asp-device-name | - | The DLTLIB command is executed with ASPDEV(*) and the RSTLIB command is extended with RSTASPDEV(asp-device-name). |
- Verify the system CCSID. The system CCSID is used when validating object names.
- Click the [Transfer iSphere library] button.
- Use the refresh button to retrieve the version of the iSphere library. Once
pressed, the version is automatically updated as the library name changes.
Auto-update is disabled, when the host name is changed.
| Use the "System Ccsid" field to specify the CCSID of your system. The value
specified here is used for validating object names. |
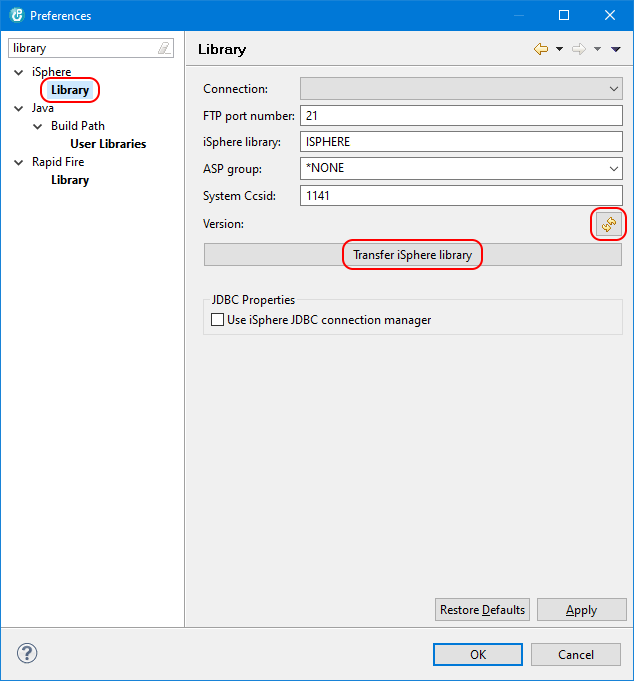
(The screenshot above is from RDi, but the WDSC screen is very
similar.)
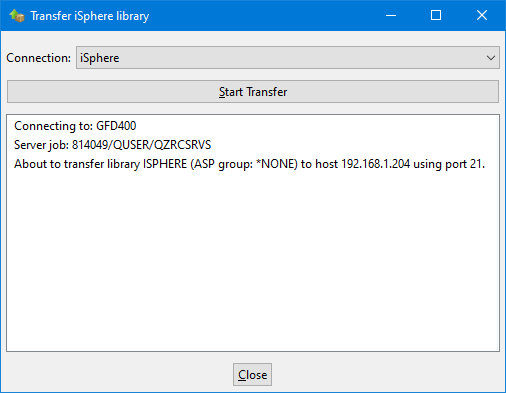
- On the following "Transfer iSphere library" dialog,
click [Start Transfer] to start the FTP transfer.
Use the ASP device name parameter to specify the
name of the ASP device for restoring the library.
| *DFAULT | - | The DLTLIB and RSTLIB commands are executed without the ASPDEV and RSTASPDEV parameters. |
| asp-device-name | - | The DLTLIB command is executed with ASPDEV(*) and the RSTLIB command is extended with RSTASPDEV(asp-device-name). |
- If the iSphere library already exists, you will be asked to
confirm that you want to delete it:
- The transfer will start and the steps will be displayed in
the window as the transfer runs.
- At the end of the transfer request a [Print job log] button will
appear:
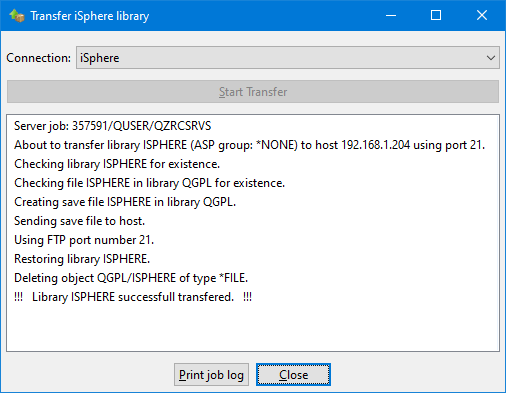
- Review the contents of the window to check, whether the library has been
successfully installed. If you need to report errors, use the context menu
to copy all messages to the clipboard and click the [Print job log] button
to print a job log on the host. Use the [Close] button to close the dialog.
Alternatively you can use CTRL-A to select all messages and
CTRL-C to copy the selected messages to the clipboard.
Doing it By Hand
There are two options for uploading the library by hand: FTP and IFS
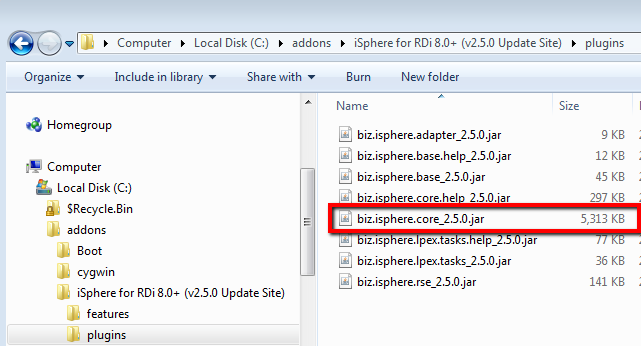
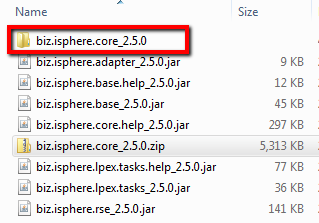
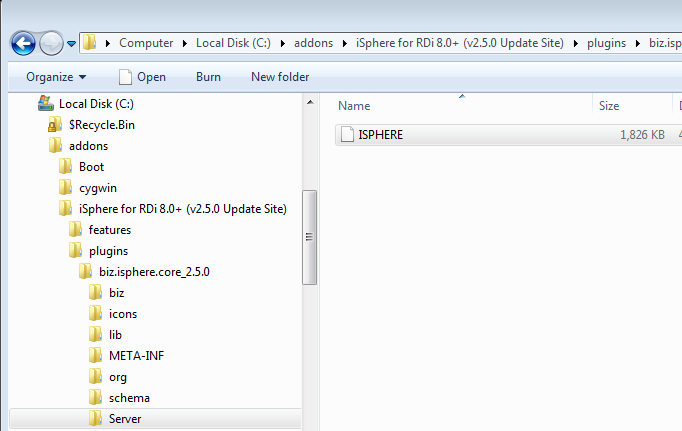
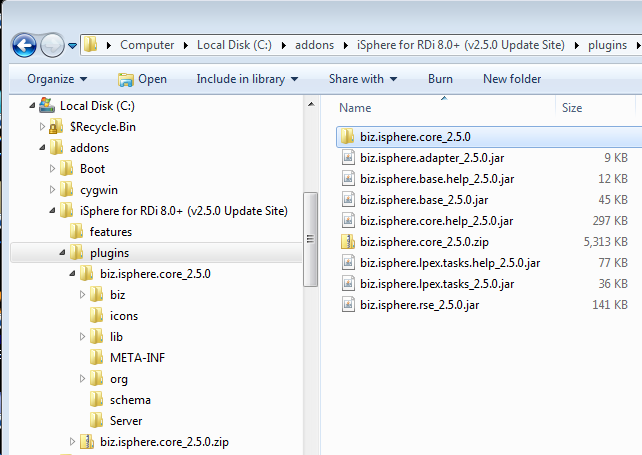
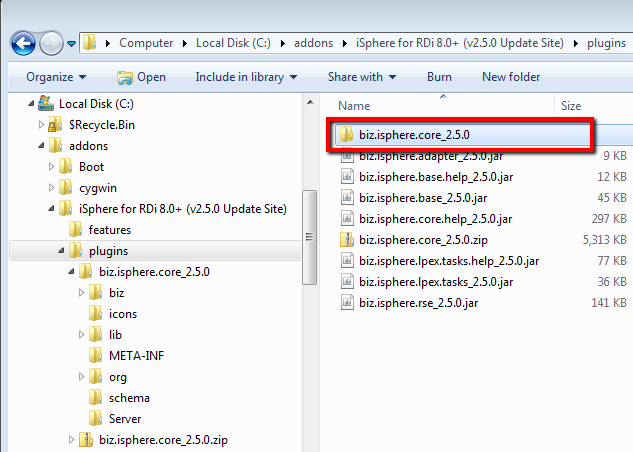
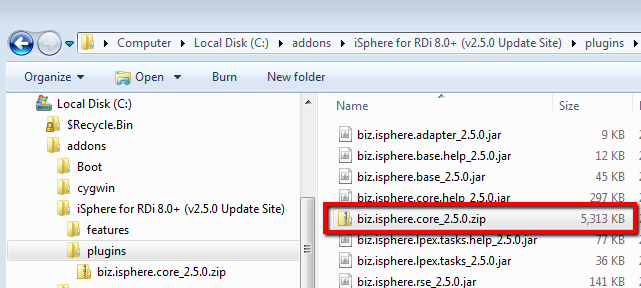
For both options you start with retrieving the save file from the plug-in jar file.
1. Retrieving the save file from the plug-in
Now decide whether you want to upload the save file with FTP or via the IFS. Choose
option 2.a for FTP and option 2.b for IFS.
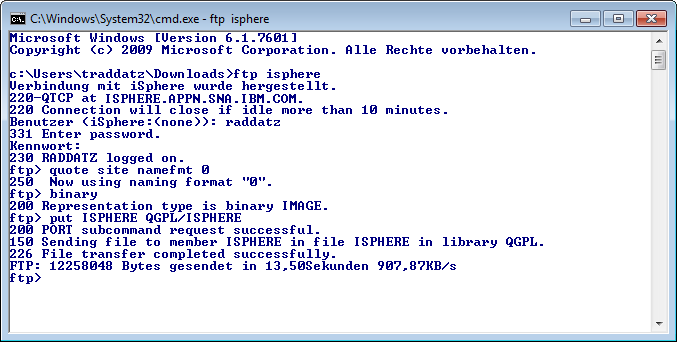
2.a Uploading save file with FTP
- Back at the PC, open a command window, start an FTP session
and transfer the local ISPHERE file into the ISPHERE
save file on your host using binary mode. The following
example uses NAMEFMT 0 (OS/400 File Naming Convention), but of
course you can also use NAMEFMT 1 (OS/400 Integrated File System
Naming Format).
2.b Uploading save file via IFS
3. Restoring library ISPHERE
Using an i Project
If you cannot use FTP to install the iSphere library, you can try to
do it with an i Project from RDi or WDSCi. First you need to copy the
iSphere project from the repository to your workspace. You may
either connect to SourceForge and check out the project directly from
the repository or download a snapshot of the repository to your PC and
import the iSphere project from there.
Please refer to The
iSphere Host Project to learn how to checkout the project from
SourceForge using SVN.
For the latter option, go to the iSphere project
home at SourceForge and click Code on the navigation bar at
the top:

Then click Download Snapshot and save the zip file to your PC.
The name of the zip file should be similar to isphere-code-1046-trunk.zip,
where 1046 is the revision number that you can safely ignore.

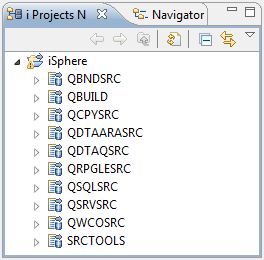
Open RDi and switch to the i Projects perspective. Select File
-> Import... -> General -> Existing Projects into Workspace
and click Next. Then choose option Select archive file
and click Browse to select the snapshot zip file. Click Deselect
All and reselect project iSphere. Click Finish to
import the project to your workspace.
Eventually build the iSphere library as described in Library
Build.